The Ultimate Party Bag Folding Guide
- adventure-quests
- Jul 2, 2024
- 2 min read
Updated: Jul 27, 2024
Planning a celebration and looking for a personal touch to make it memorable? There's no better way to add a sprinkle of charm and creativity than by crafting your own party bags! In this step-by-step guide, I'll walk you through the fun and easy process of folding your very own party bags. Not only will this activity unleash your inner creativity, but it will also add a unique flair to your event that guests will adore. Let's dive into the delightful world of DIY and get those party bags ready to impress!
You will need:
Printer
Paper
Glue
A party bag design!

To start, print your A4 party bag design onto your chosen paper. A small border around the edge is perfectly fine, as it will be folded into the bag.

Then fold 1cm or so in from one edge as shown.

Next, turn over the paper and simply fold the rest of the paper to the fold line and crease.

Open up the paper. With the white side up, now put a line of glue along the 1cm strip on the side of the picture.

Then refold.
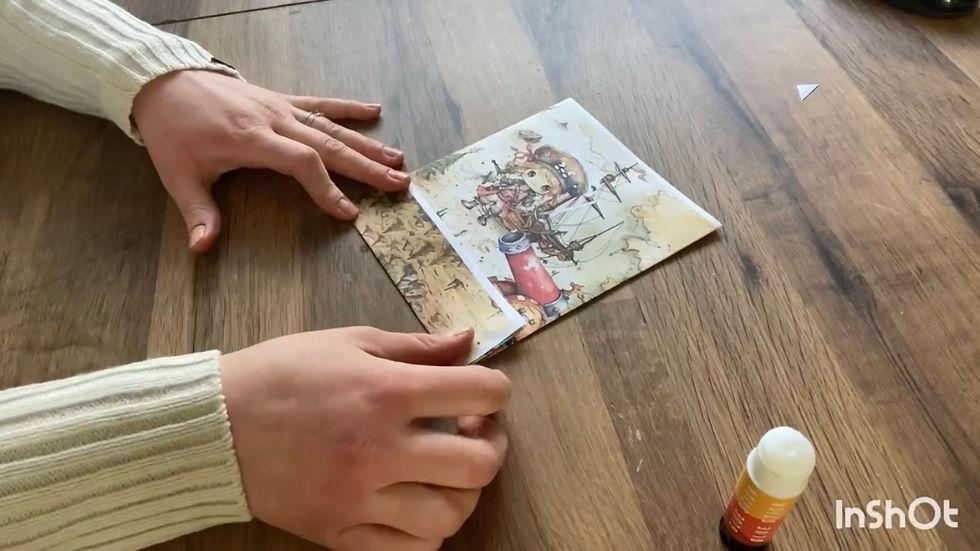
Next fold up the bottom of the paper by a few centimeters.

Fold down each corner of the little rectangle to meet the bottom of the paper.

Unfold and then open out the bottom.
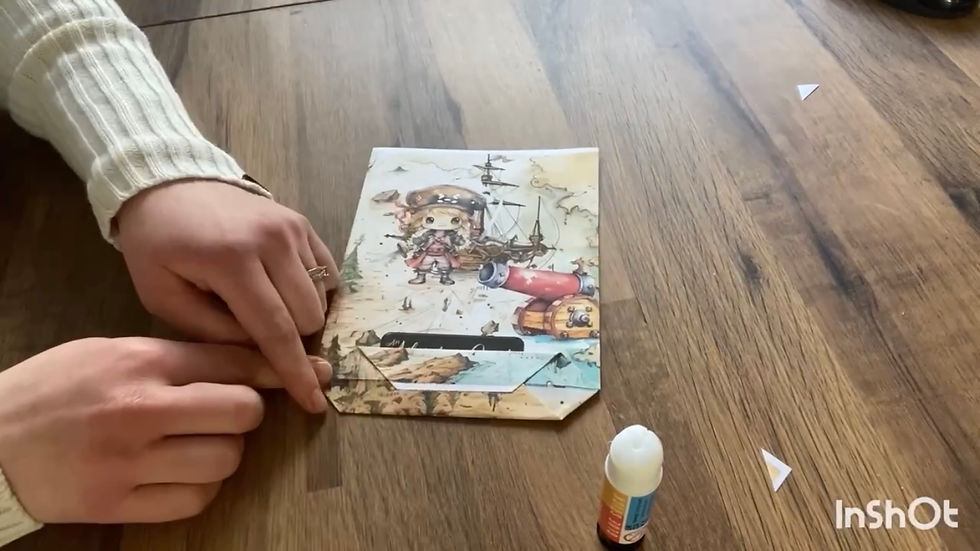
Fold the top and bottom to meet and glue down.

Fold along each side of the bag and crease.

You should then be able to put your hand inside the bag and push the folds so they are on the inside.
There you have it! A themed budget friendly party bag!
Once you have filled with treats you fancy, simply fold over the top a couple of times to secure!

Prefer to watch a video?!

Comments